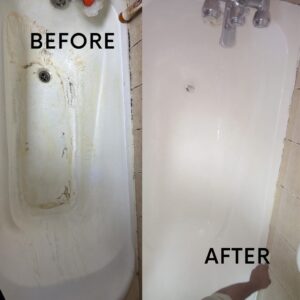
Bath tub Crack fix : A Step-by-Step Guide
Cracks in bath tub Crack Fix are a common issue that can arise from heavy use, accidental impacts, or natural wear and tear. Not only do they affect the appearance of your tub, but they can also lead to leaks, water damage, and mold growth if left unchecked. Fortunately, fixing a bathtub crack is a manageable task for most homeowners. Here’s a detailed guide on how to fix a bathtub crack and restore your tub to its former glory.
Why Bathtub Cracks Happen
Bathtubs can crack due to several reasons, including:
- Impact Damage: Dropping heavy objects or impacts from cleaning tools.
- Wear and Tear: Over time, the materials in your bathtub can weaken, leading to cracks.
- Improper Installation: If the bathtub wasn’t installed securely, stress on certain areas can lead to cracks.
Materials Needed Bath tub Crack Fix
Before beginning the repair, gather the following materials:
- Epoxy or bathtub repair kit
- Sandpaper (medium grit)
- Painter’s tape
- Cleaning supplies (mild soap and water)
- Putty knife or applicator
- Rubber gloves
Step-by-Step Guide to Fixing a Bathtub Crack
1. Clean the Area
The first step in fixing a bathtub crack is to thoroughly clean the damaged area. Use mild soap and water to remove dirt, soap scum, or oils. After cleaning, dry the surface completely with a clean towel. This ensures that the repair material adheres properly.
2. Sand the Crack
Use medium-grit sandpaper to lightly sand around the crack. This roughens the surface, making it easier for the epoxy or filler material to bond. Sand around the crack but be careful not to sand too aggressively and damage the surrounding area.
3. Apply Painter’s Tape
To protect the surrounding area and create a clean line for your repair, apply painter’s tape around the crack. This will help you control the spread of the repair material and keep it from getting on parts of the tub you don’t want to fix.
4. Mix the Epoxy or Repair Compound
If you’re using a bathtub repair kit, it likely comes with an epoxy or resin that needs to be mixed. Follow the instructions on the packaging to combine the two parts correctly. The mixture should be smooth and free of air bubbles.
5. Apply the Repair Material
Using a putty knife or the applicator provided with your repair kit, apply the epoxy or resin mixture into the crack. Make sure to fill the crack completely and smooth the surface so that it matches the contour of the bathtub. Smooth out any excess material for a seamless finish.
6. Allow the Repair to Dry
Let the repair material cure and dry completely. The drying time will depend on the product you’re using, but it usually takes at least 24 hours. Avoid using the bathtub during this time to ensure the repair is fully set.
7. Sand and Smooth the Surface
Once the repair material is completely dry, lightly sand the patched area with fine-grit sandpaper to smooth out any unevenness. Be careful not to scratch the surrounding surface of the tub.
8. Polish the Surface
For an even finish, polish the area with a soft cloth to restore the shine. If the color of the repair doesn’t exactly match your bathtub’s surface, you can apply a matching paint or refinishing compound to make the area blend in better.
When to Call a Professional
While fixing a bathtub crack yourself can save you money, there are times when it’s best to call in a professional. If the crack is large, runs deep, or affects the structural integrity of the tub, it may be best to consult a plumber or bathtub specialist. Additionally, if you’re unsure about the materials or process, a professional can ensure a long-lasting, high-quality repair.
Conclusion
Fixing a bathtub crack is a straightforward process that most homeowners can tackle on their own with the right materials and approach. By following this guide, you can repair small cracks in your bathtub and restore its appearance and functionality. However, always assess the severity of the crack and remember that professional help may be necessary for more extensive damage. Regular maintenance